 FAQ
FAQ
A list of frequently asked questions
 Virtual Environments
Python virtual environments are a powerful tool that can help you manage dependencies and isolate your projects from one another. Here are some benefits of using virtual environments in Python:
-
Avoid system pollution: Virtual environments allow you to install packages and dependencies without affecting the system's global Python installation. This helps you avoid conflicts between different versions of packages and dependencies.
-
Sidestep dependency conflicts: Virtual environments allow you to create isolated environments for each project, which means that you can have different versions of the same package installed in different environments without any conflicts.
-
Minimize reproducibility issues: Virtual environments help you ensure that your code runs consistently across different machines and platforms. By creating an environment with the same dependencies as your project, you can ensure that your code will run the same way on different machines.
-
Dodge installation privilege lockouts: Virtual environments allow you to install packages and dependencies without requiring administrator privileges. This can be especially useful if you're working on a shared machine or don't have administrator access.
-
Enhanced collaboration: Virtual environments can help you collaborate with other developers more effectively. By sharing your virtual environment configuration files, you can ensure that everyone is using the same dependencies and versions of packages.
To use virtual environments in Python, you can use the built-in venv module or third-party tools like virtualenv or conda. You can create a new virtual environment for your project, activate it, and install packages into it. Once you're done working on your project, you can deactivate the environment and switch to a different one.
requirements.txt
A requirements.txt file is a plain text file that lists the packages and libraries required for a Python project. It is used to specify the exact versions of these packages and libraries, making it easier to install, review, and reproduce the requirements of an environment. This file is usually stored in the root directory of the project and can be used to download all the packages at once with a pip command.
For instance, if you have a Python project that uses a specific version of a package, you can list that package and its version in the requirements.txt file. When you share your project with others, they can install the same Python modules you have listed in your requirements file and run your project without any problems.
To create a requirements.txt file, you can navigate to your Python project directory and create a new .txt document named requirements.txt. Then, add the names of the modules you would like to install, along with the required version, on separate lines. You can also generate a requirements.txt file directly from the command line with the following command:
pip freeze > requirements.txt
Use manual commands
Run the following commands in order to create a virtual environment.
python -m venv .venv
.venv\Scripts\activate
python -m pip install -U pip
pip install -r requirements.txt
Use VS Code
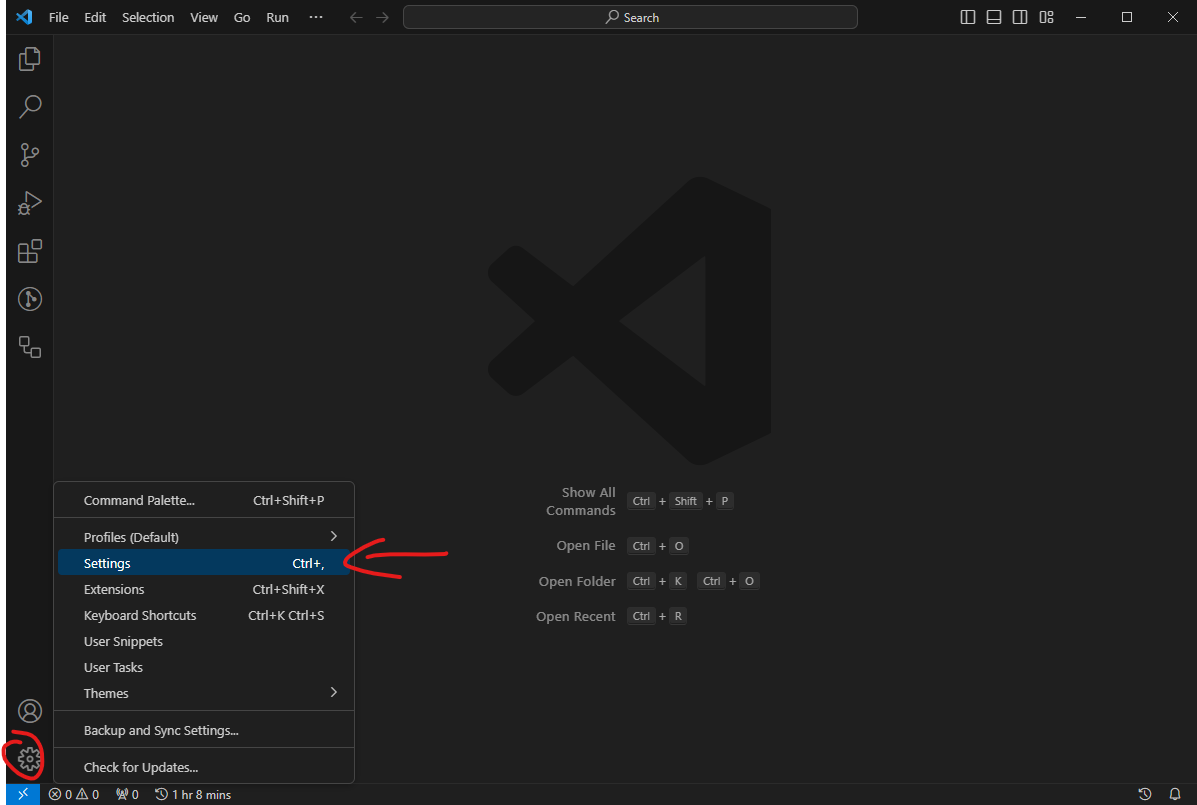
Make a change in the VS Code setting to enable the Create Environment... button. You only need to modify this setting once.
Go to Manage then Settings
Type create env in the search bar then set Python > Create Environment Content Button to show
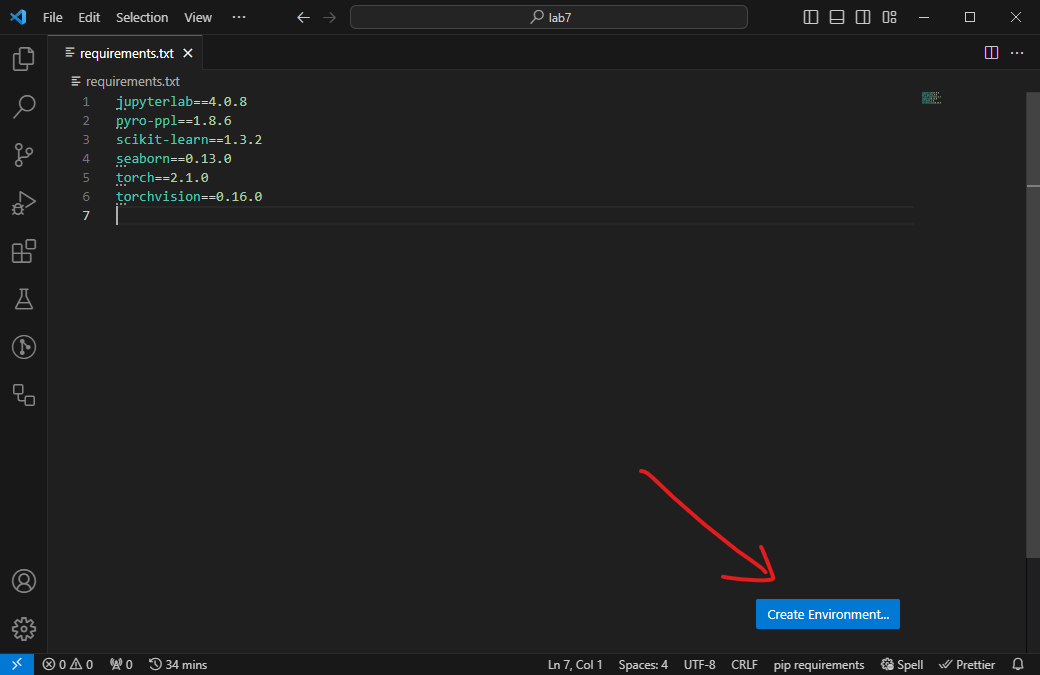
For each new Python project, simply following the steps below.
-
Locate the
requirements.txtfile and the Create Environment... button on the bottom right. -
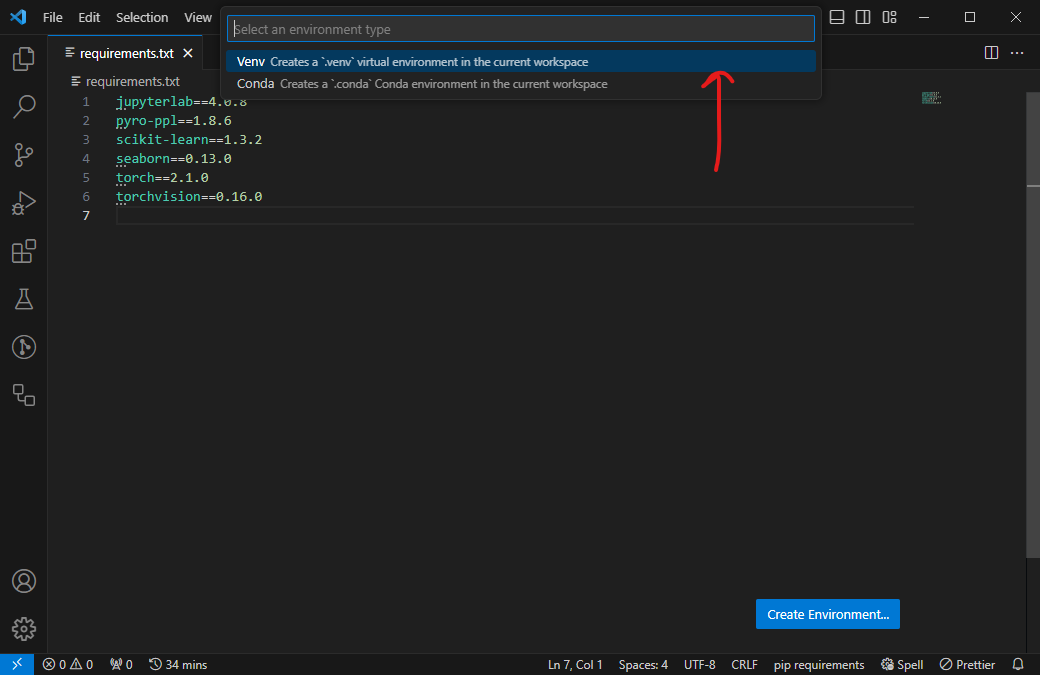
Choose Venv.
-
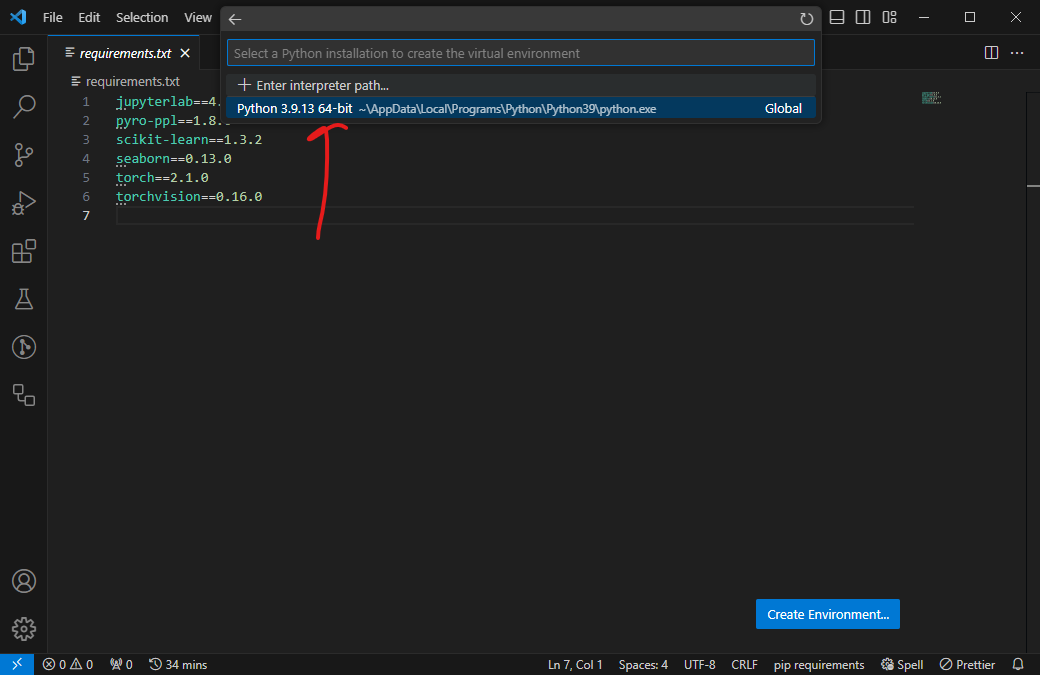
Select your Python interpreter from the dropdown list.
-
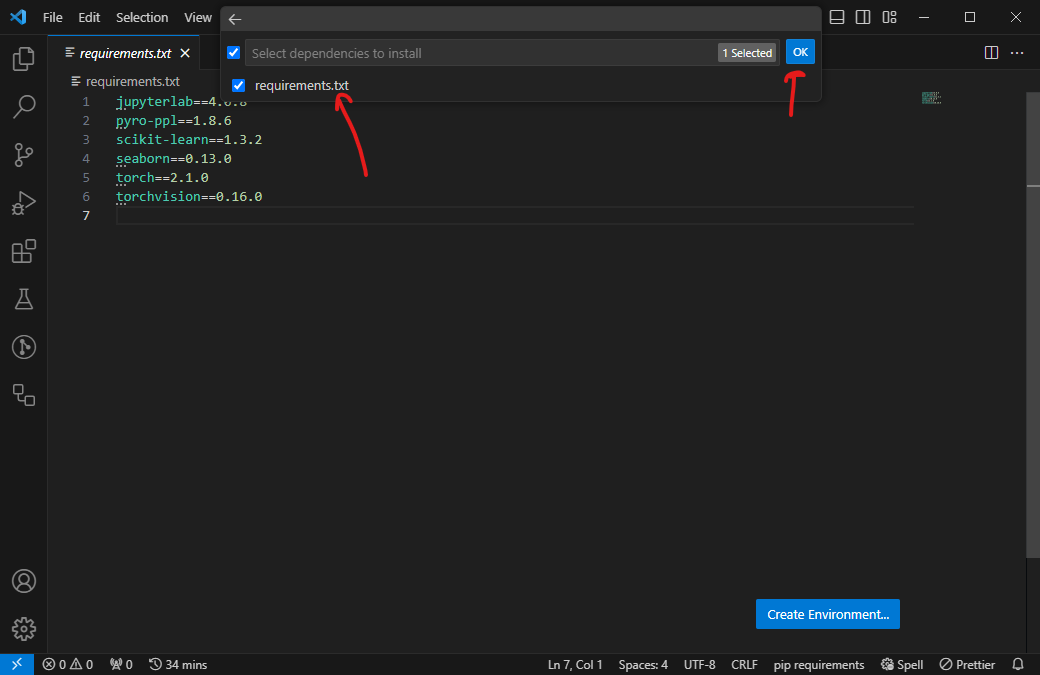
Check the
requirements.txtfile and press OK. -
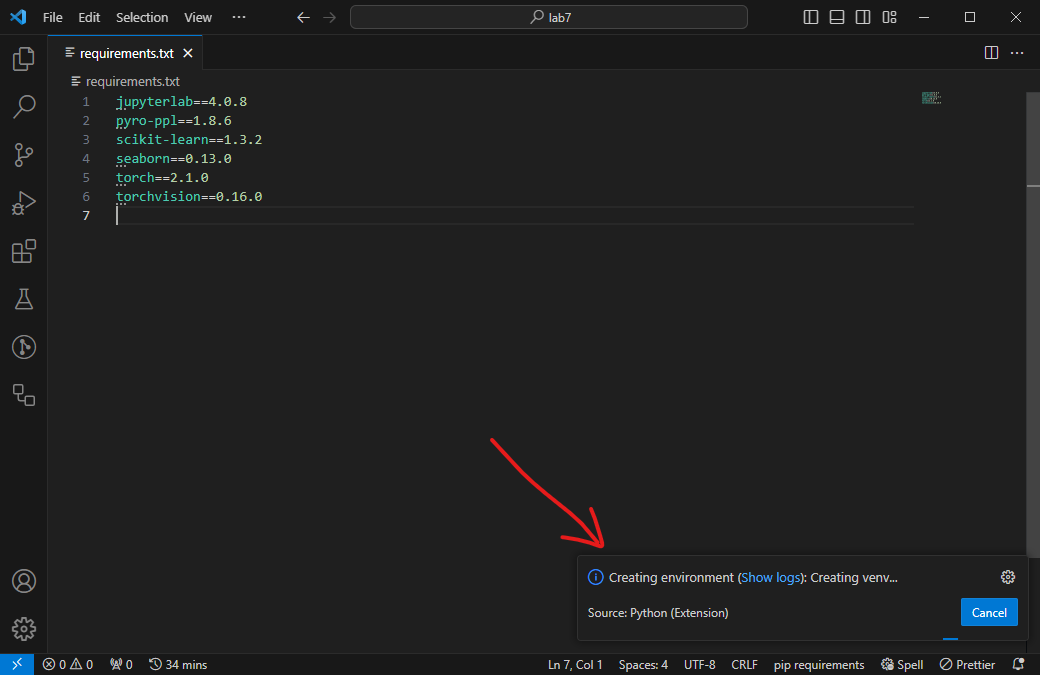
VS Code will handle the virtual environment creation behind the scene. It run the manual steps aforementioned.
-
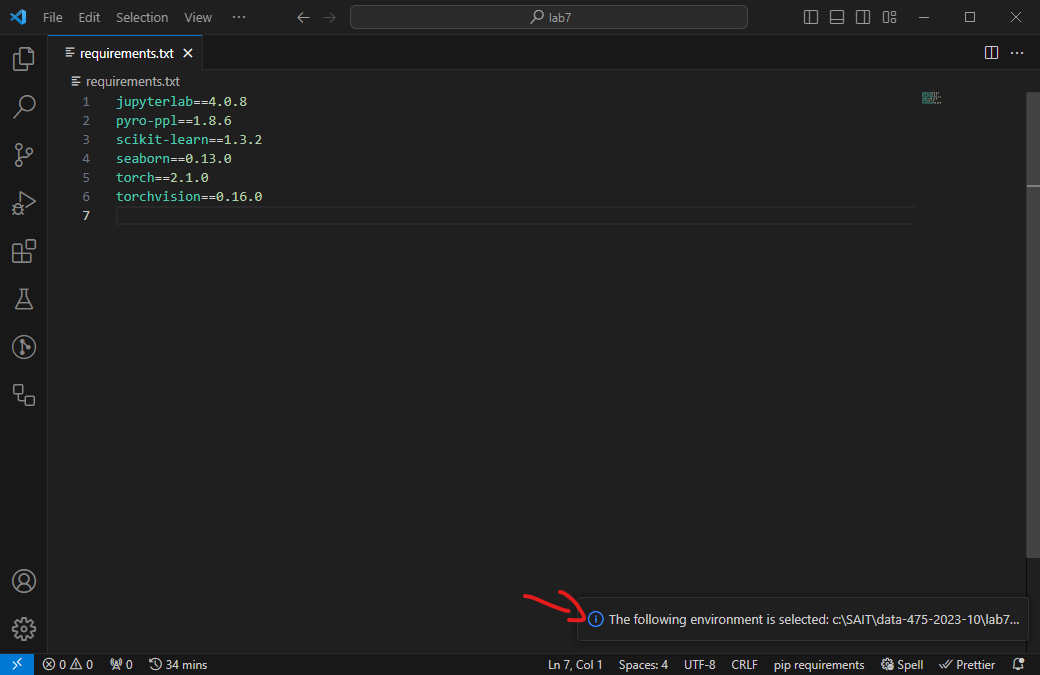
After the virtual environment is created, VS Code also selects to use it automatically.
Execution Policy
ONLY if you encounter an error about VS Code not being able to activate the virtual environment, Use the following steps to resolve the issue.
-
Terminate all VS Code windows.
-
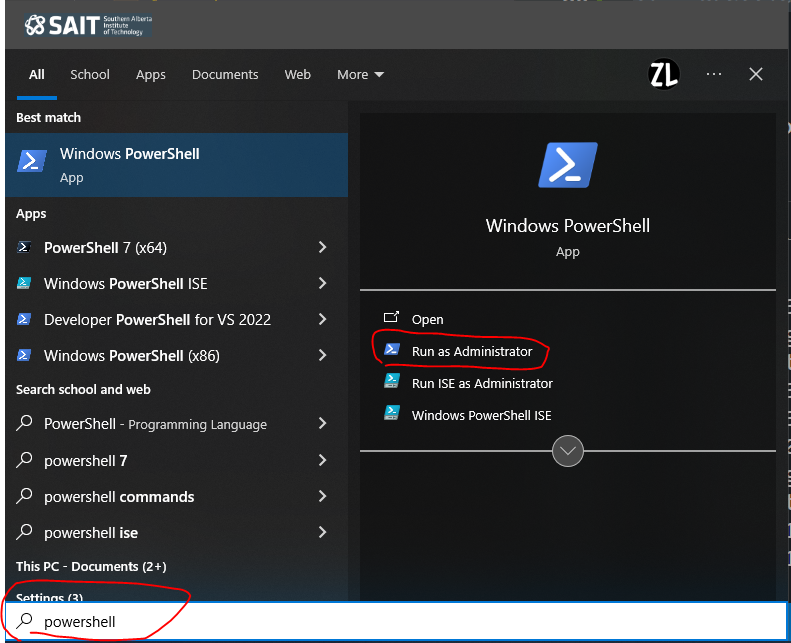
Open PowerShell in administrator mode.
-
Copy/Paste and run the following command.
The PowerShell command Set-ExecutionPolicy is used to change the execution policy for PowerShell scripts on a system. The execution policy determines the level of restriction for running PowerShell scripts and is a security feature designed to prevent the execution of potentially harmful scripts.
When you set the execution policy to "Unrestricted", it allows the execution of all scripts without any restrictions. This means that any script, regardless of its source or signature, can be run on the system without prompting for permission.
 SSL Error when using
 fetch_openml
Add the following two lines of code at the top of the Python script.
See reference from StackOverflow.
The first line imports the ssl module, which provides access to Transport Layer Security (TLS) and Secure Sockets Layer (SSL) cryptographic protocols. The second line sets the default SSL context to an unverified context. This is useful when you want to bypass SSL certificate verification for testing or development purposes.
By default, Python's SSL context verifies the server's SSL certificate to ensure that the connection is secure. However, in some cases, such as when working with self-signed certificates or testing with a local server, you may want to disable certificate verification. This is where the ssl._create_unverified_context() method comes in handy. It creates an SSL context that does not verify the server's SSL certificate, allowing you to establish a connection even if the certificate is invalid or self-signed.
